
ANNONCE
Table of Contents
Introduction:
Elephant ear pastries are one of the most beloved indulgences in bakeries and street food stalls around the world. Their crispy texture, sweet coating, and simple yet decadent flavor profile make them a favorite for anyone with a sweet tooth. The appeal of elephant ear pastries goes beyond their taste – it’s the nostalgia of fairgrounds, the crunch as you take your first bite, and the sheer joy of a treat that’s both simple and extraordinary.
Whether you’ve had them at a local carnival or tried a store-bought version, nothing compares to the homemade variety. Making them at home allows you to perfect the texture, customize the toppings, and truly make them your own. But before diving into the recipe, it’s important to understand the origins of this pastry and how it evolved into the beloved treat it is today.
The Origins of Elephant Ear Pastries: A Sweet History
Elephant ear pastries trace their roots to European street food, where they were traditionally called “Palmiers” or “Faworki.” In many countries, variations of this pastry have been sold for centuries, often served during festivals or as a treat for special occasions. The term “elephant ear” is believed to describe the pastry’s large, flat shape, which resembles the wide ears of an elephant.
As these pastries traveled across Europe, they made their way to North America, particularly in areas with large agricultural fairs. In the United States, they became a popular treat at carnivals and food trucks. The irresistible combination of crispy dough and sugar quickly turned them into a must-have for anyone attending a fair or festival.
ANNONCE
Over time, the recipe and serving style adapted to regional tastes, but the fundamental concept of an airy, crunchy pastry with a sweet coating remained unchanged. Today, elephant ears are not only sold at fairs but are also a popular treat in bakeries, with many variations and creative twists.
ANNONCE

Ingredients You Need to Create Perfect Elephant Ear Pastries
The magic of elephant ear pastries lies in their simplicity. With just a few basic ingredients, you can create a golden, crispy, and flavorful pastry that feels like a true indulgence. The following is a breakdown of the key ingredients you’ll need:
| Ingredient | Quantity | Purpose |
| All-purpose flour | 2 ½ cups | The base of the dough |
| Salt | ¼ tsp | To enhance the flavor |
| Sugar | ¼ cup | Sweetener for the dough |
| Baking powder | 1 tsp | To help the dough rise slightly |
| Water | 1 cup | To bind the dough |
| Butter (melted) | 4 tbsp | Adds richness and flavor |
| Vegetable oil | For frying | Needed for deep frying |
| Cinnamon | 2 tbsp | A classic flavor for coating |
| Granulated sugar | ½ cup | To coat the pastry after frying |
Core Ingredients: Flour, Sugar, and Butter
The backbone of an elephant ear pastry is the dough. All-purpose flour provides structure and texture. A touch of sugar sweetens the dough slightly, while butter adds the richness that gives the pastry its satisfying taste. The combination of these simple ingredients creates the base for a crispy, golden pastry that is impossible to resist.
ANNONCE
Key Flavor Enhancers: Cinnamon, Vanilla, and More
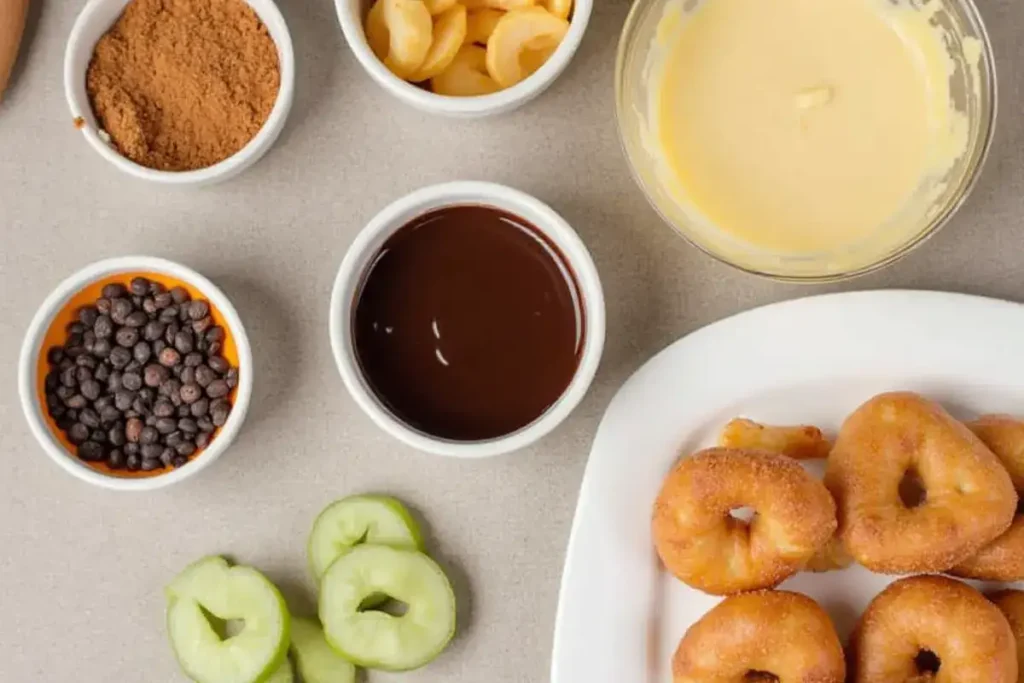
The hallmark of a traditional elephant ear is its sweet coating. Cinnamon and sugar are the most common combination used to dust the pastry, giving it a familiar, comforting flavor. However, you can also experiment with different flavorings like vanilla extract, nutmeg, or even cocoa powder to personalize your recipe.
Optional Ingredients: Customizing Your Pastry
The beauty of making elephant ears at home is the ability to customize. You can try adding chocolate chips, caramel, or even a drizzle of honey for an extra indulgent treat. Some bakers even create savory versions, using garlic, parmesan, or herbs to change up the flavor profile.
How to Make Elephant Ear Pastries: A Step-by-Step Guide
Making elephant ear pastries is easier than you might think. While the steps are straightforward, attention to detail is key in achieving the perfect texture and flavor. Here’s a step-by-step guide:
Preparing the Dough: The Foundation for a Flaky, Crispy Texture
To begin, combine the flour, sugar, salt, and baking powder in a large mixing bowl. Slowly incorporate the water, mixing until a rough dough begins to form. Then, knead the dough on a lightly floured surface for 5-7 minutes, or until it reaches a smooth, elastic consistency. Once your dough is ready, cover it with a clean kitchen towel and allow it to rest for at least 30 minutes. This resting time allows the dough to relax, making it easier to roll out.
ANNONCE
Shaping the Dough: How to Get That Classic “Elephant Ear” Look
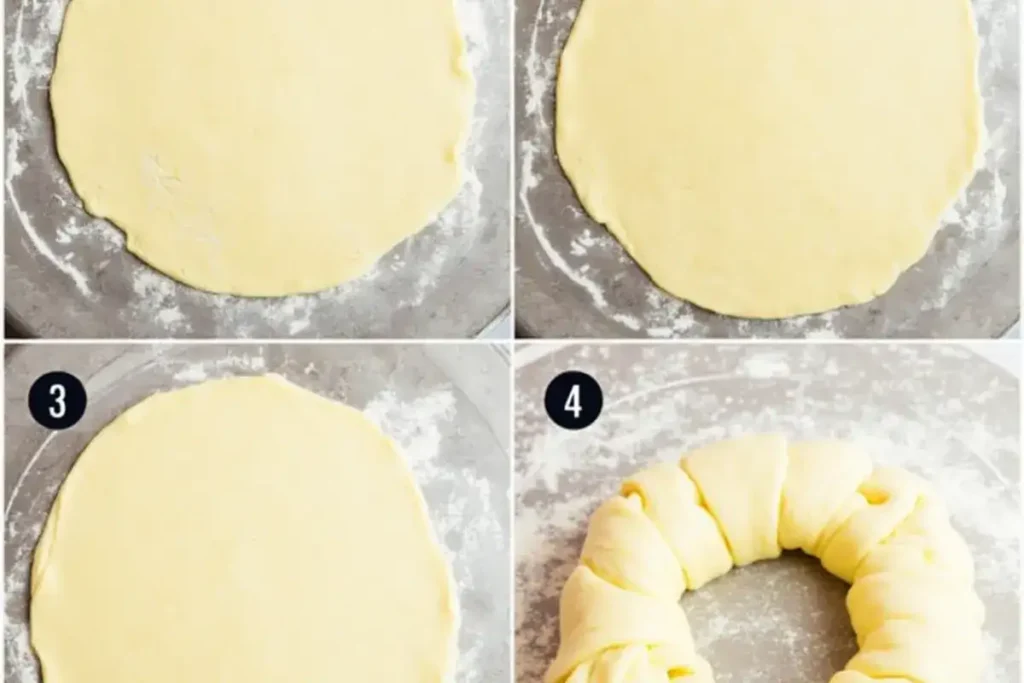
Once the dough has rested, divide it into smaller portions. Roll each portion into a thin rectangle, about ¼ inch thick.. The thinner you roll the dough, the crispier your pastry will turn out. Once the dough is rolled out, use a sharp knife to trim the edges, giving it a more uniform, elephant ear-like shape.
Frying vs Baking: What’s the Best Method for Perfect Elephant Ears?
Traditionally, elephant ear pastries are deep-fried for that perfectly crispy texture. Heat vegetable oil in a deep pan or fryer to 375°F (190°C). Gently lower each dough piece into the hot oil and fry until golden brown, about 2-3 minutes on each side. Be careful not to overcrowd the pan, as this can cause the oil temperature to drop and result in soggy pastries.
If you prefer a healthier alternative, you can bake your elephant ears at 375°F (190°C) for about 15 minutes, flipping halfway through. While the texture may not be as crunchy as the fried version, baking still produces a delicious and lighter pastry.
Coating the Pastry: Sugar and Cinnamon Magic
Once the elephant ears are cooked, transfer them to a plate lined with paper towels to absorb any excess oil. While they’re still warm, generously sprinkle the pastries with cinnamon and sugar. The sugar will stick to the warm dough, creating a sweet, crunchy coating.
ANNONCE
Creative Variations on the Classic Elephant Ear Pastry
While the traditional elephant ear pastry is undeniably delicious, you can get creative with different flavor variations to make it your own.
Adding Fillings: Fruit, Chocolate, and More
For an extra indulgent twist, consider adding a filling to your elephant ear. You can roll fruit, like sliced apples or berries, into the dough before frying for a sweet and tart contrast. Alternatively, melt chocolate and spread it on the dough before frying for a gooey, decadent experience.
Going Savory: Unique Flavors to Try with Your Elephant Ears
If you’re looking to break away from the sweetness, try making savory elephant ears. You can add garlic, parmesan cheese, and a sprinkle of oregano for a Mediterranean-inspired twist. Another savory version involves adding cooked spinach and feta cheese for a pastry that is both light and flavorful.
Gluten-Free and Vegan Options: Making Elephant Ears for Everyone
For those with dietary restrictions, gluten-free and vegan options are easy to make. Swap regular flour for a gluten-free flour blend and use non-dairy butter or oil instead of dairy products. Many vegan recipes also suggest using plant-based milk in place of water for a richer dough.
ANNONCE
Serving and Storing Elephant Ear Pastries: Tips for Enjoyment
Once your elephant ears are made, it’s time to enjoy them. But how do you best serve and store them?
Best Ways to Serve Elephant Ear Pastries: Pairing with Drinks or Ice Cream
Elephant ears are often served at fairs with a cold beverage like lemonade, iced tea, or hot chocolate. For an extra indulgent treat, serve your pastry with a scoop of vanilla ice cream or a drizzle of caramel sauce.
How to Store Leftovers: Keeping the Crunch and Freshness
While elephant ears are best enjoyed fresh, you can store leftovers for up to two days. Store them in an airtight container at room temperature. If they lose some of their crispiness, reheat them in the oven for a few minutes to restore their crunch.
Reheating Tips: Enjoying Elephant Ears Even After a Day or Two
To reheat, skip the microwave as it can make the pastry soggy. Instead, preheat your oven to 350°F (175°C) and bake the pastries for 5-7 minutes, or until they’re warm and crispy again.
ANNONCE
Conclusion:
Homemade elephant ear pastries are more than just a treat; they’re an experience. From the simple ingredients to the satisfaction of pulling a golden, crispy pastry out of the fryer, making elephant ears from scratch is a rewarding endeavor. Whether you stick to the classic cinnamon sugar version or get creative with fillings and flavors, these pastries offer endless possibilities for customization.
By making elephant ears at home, you get the chance to perfect your technique and enjoy a fresh batch anytime you crave that fairground flavor. Don’t wait for the next carnival—try making your own elephant ears today and elevate your baking skills to new heights.
Frequently Asked Questions
Is it possible to bake elephant ears instead of frying them?
Yes, you can bake elephant ears. While they may not be as crispy as the fried version, baking them at 375°F (190°C) for 12-15 minutes can still yield
a delicious result.
ANNONCE
How can I make elephant ears healthier?
To make them healthier, consider baking instead of frying and using less sugar. You can also try using whole wheat flour or a gluten-free flour blend for a more nutritious alternative.
Can I freeze elephant ears for later?
It’s best to enjoy elephant ears fresh. If you have leftovers, you can freeze them. Wrap each pastry in plastic wrap and store them in an airtight container. To reheat, bake at 350°F (175°C) until heated through.
What’s the best way to serve elephant ear pastries at a party?
For a fun presentation, serve elephant ears on a platter with a variety of toppings, such as whipped cream, chocolate sauce, or a dusting of powdered sugar. Pair them with refreshing drinks like iced lemonade or sweet iced tea.

