ANNONCE
personal anecdote
Growing up, Halloween was always my favorite time of year. The cool autumn air, the crunch of leaves underfoot, and the excitement of trick-or-treaters filled the streets. But what truly made my heart race was our home’s décor. My parents embraced every spooky element they could find, especially those iconic black cauldrons that seemed to bubble with mystery and magic. Each year, we would spend weekends crafting the most fantastical decorations, and the cauldron became a symbol of our Halloween spirit. Those memories inspired me to create my own DIY Halloween cauldrons, and I want to share that joy with you. Whether you’re a seasoned DIY enthusiast or just starting, this guide will help you create stunning DIY Halloween cauldrons that can enchant your home decor.
why you will like this DIY Halloween Cauldrons
DIY Halloween cauldrons add a unique touch to your home, allowing you to express your style in a festive way. Here are some reasons why you’ll love making them:
- Customization: One of the best parts about DIY projects is the ability to personalize them. You can choose colors, sizes, and designs that fit your aesthetic or the theme of your Halloween celebration.
- Cost-effective: Making your own decorations can save money, especially when you have multiple elements to create. Plus, you can repurpose materials from past projects or items around the house.
- Fun for all ages: DIY Halloween cauldrons are perfect for family projects, allowing everyone to get involved—whether it’s painting, gluing, or assembling your magical concoction.
- Versatile decor: While traditionally associated with Halloween, cauldrons can transition into fall décor, either as home accents for Thanksgiving or storage containers for seasonal items.
By creating your own cauldrons, you not only hone your crafting skills but also create cherished memories with loved ones.
materials and tools needed for DIY Halloween Cauldrons
Before diving into the crafting process, let’s outline the materials and tools you will need:
ANNONCE
Basic Materials
- Container Base: Choose from plastic cauldrons (available at craft stores), old pots, or large rocks that can mimic cauldron shapes.
- Paint: Black spray paint or acrylic paint. Consider adding metallic paints (gold or silver) for accents.
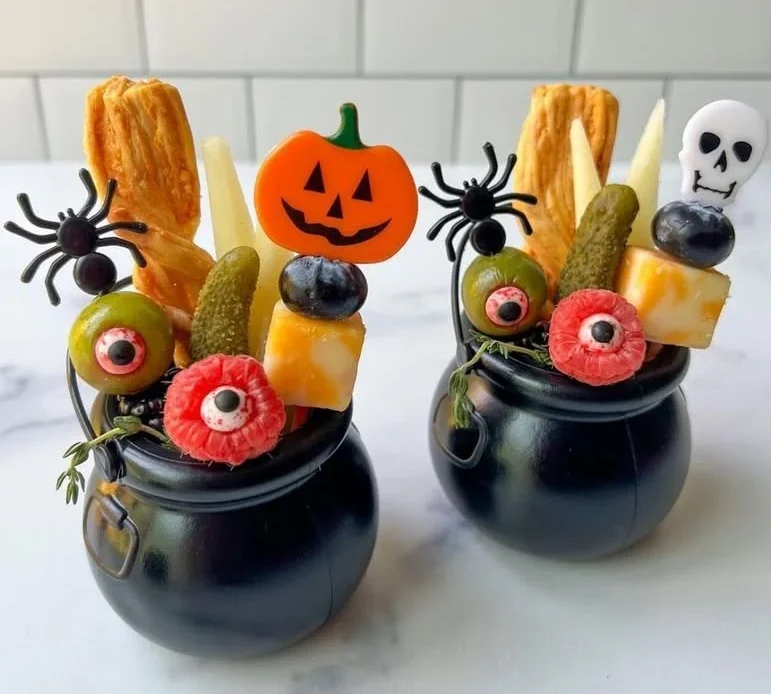
- Decorative Elements: Fake spiders, skulls, moss, leaves, and glow-in-the-dark stickers.
- Lighting: Battery-operated tealights, LED string lights, or glow sticks for added effects.
- Fillers: Candy, colorful stones, or fall-themed items like mini pumpkins can be used to fill the cauldron.
Tools Needed
- Paintbrush (if using acrylic paint)
- Scissors or a utility knife (for cutting foam or decorative elements)
- Hot glue gun and glue sticks
- Craft sponge or brush for applying paint
- Twine or ribbon (for hanging decorations)
Optional Accessories
- Stencils for painting designs.
- Cauldron lids, which can be crafted from cardboard or plastic and decorated.
- A cauldron “stirring stick” or broom for added flair.
step-by-step guide: how to create DIY Halloween Cauldrons
Creating homemade cauldrons is an enjoyable process. Follow these steps to bring your spooky creation to life:
Step 1: Select Your Container
Choose your base. If you want a small cauldron, a plastic pumpkin bucket or pot will suffice. For larger displays, consider using a metal pot or sturdy plastic cauldron.
Step 2: Prepare the Surface
If you’re painting, start by cleaning your container to remove any dust. If working with a surface that resists paint, like non-porous plastic, lightly sand it first.
Step 3: Paint Your Cauldron
- Use your paintbrush or spray paint to coat the exterior of your cauldron. A couple of coats may be necessary to achieve an even look.
- Once painted, set it aside to dry completely. This may take several hours, depending on the paint type or thickness applied.
Step 4: Decorate
Once dry, start decorating!
ANNONCE
- Use a hot glue gun to attach moss, fake spiders, or skulls to the cauldron.
- Consider layering materials for visual depth. For example, gluing a layer of moss first, then adding garnishes like spider webs or faux critters.
Step 5: Add Lighting
Place battery-operated tealights or string lights inside the cauldron. Be creative; you can let lights peek through gaps in the decorative elements for a spooky glow.
Step 6: Finishing Touches
Wrap twine or ribbons around the cauldron’s rim to give it dimension. You may also attach the “stirring stick” for added authenticity. Ensure everything is secure and cohesive in design.
how to attach or secure DIY Halloween Cauldrons elements
To ensure all decorative elements stay in place, adhere to these tips:
- Hot Glue: This is one of the most reliable adhesives for crafts. Apply a generous amount and hold down the decorative pieces for a few seconds while it sets.
- Spray Adhesive: For lighter elements such as glitter or faux leaves, a spray adhesive can evenly coat surfaces and ensure items stick without excess bulk.
- Wire or Twine: Consider using wire for heavier decorations, which you can bend and shape around your cauldron. Twine can be tied securely around handles or edges for a rustic look.
- Double-Sided Tape: This can work well for lighter decorations that won’t come in contact with moisture.
factors affecting quantity of materials for DIY Halloween Cauldrons
Several factors will impact how much of each material you’ll need:
ANNONCE
- Size of the Cauldron: The larger the cauldron, the more filling and decorative materials you will require.
- Complexity of Design: More intricate designs will need more decorative elements and materials to achieve a layered look.
- Display Area: If the cauldron is part of a bigger display, consider how your other decorations will interact with it, possibly requiring additional elements to balance your décor.
- Event Type: Whether it’s for a party or just home decoration may influence the amount of candy or light that you might want to use within the cauldron.
budget-friendly tips for DIY Halloween Cauldrons
Creating DIY Halloween cauldrons shouldn’t break the bank. Here are some budget-friendly tips:
- Repurpose Your Supplies: Look around your home for materials you can use. Empty containers, fabric scraps, or old Halloween decorations that need a refresh can work wonders.
- Buy in Bulk: If you require multiple materials, check if you can purchase them in bulk or use coupons for craft stores.
- Nature Hunt: For decorative elements, consider going on a nature hunt! Gather items like twigs, leaves, and stones that can add character to your cauldron.
- Use Dollar Store Supplies: Check your local dollar store for budget-friendly craft supplies. They often have items like cauldrons, fake spiders, and decorative filler materials for very little cost.
money-saving tips for DIY Halloween Cauldrons
Saving money is essential when tackling seasonal crafts. Here’s how to do it effectively:
- Plan Ahead: Start your decoration journey well before Halloween. This allows you to find sales and special deals on supplies.
- Join Community Groups: Local crafting groups or online forums can share tips or even offer leftover supplies.
- Craft Swaps: Organize or participate in local craft swaps to exchange materials you don’t need for items that will enhance your DIY projects.
- DIY Over Purchase: Instead of buying expensive decorations, consider making them. Simple DIY projects can be made at a fraction of the cost of store-bought items.
FAQs about creating DIY Halloween Cauldrons
Q1: How long does it take to make a DIY Halloween cauldron?
A1: The time it takes varies based on complexity. A simple cauldron may take 2-3 hours, including drying time, while more intricate designs can take several days.
Q2: Where can I find inspiration for DIY cauldron designs?
A2: Platforms like Pinterest, Instagram, and TikTok are loaded with ideas. You can also visit local craft stores for inspiration or read Halloween-themed blogs.
ANNONCE
Q3: Can DIY cauldrons be reused for future Halloween decorations?
A3: Absolutely! With careful storage, your DIY cauldrons can be reused, and you can refresh them every year by changing the décor or filling items.
your turn to create DIY Halloween Cauldrons
Now that you have all the tools and knowledge to create your own DIY Halloween cauldrons, it’s time to unleash your creativity! Gather your materials, invite family or friends to join, and make crafting part of your Halloween tradition. Whether you choose to make spooky or whimsical designs, remember to enjoy each step of the process. Your DIY Halloween cauldrons can become not just beautiful decorations but also vessels for treasured memories for years to come. Happy crafting!